本文主要说的是使用CSS控制图片的样式,由于不是专业前端从业人员,我也不知道哪些是CSS3新增的内容,能确定的都会相应部分说明;另外,本文以 CSS Images 官方教程为大纲。
本文主要内容是CSS3中新增的 filter 属性,具体参见 图片滤镜 部分。
常用图片效果
圆角图片
使用 border-radius 属性可以实现圆角(圆形)图片。
1 2 3 4 5 6
| .image-demo-1 a:first-of-type img { border-radius: 15px; } .image-demo-1 a:last-of-type img { border-radius: 50%; }
|
Thumbnail图片
使用 border 属性可以实现“拇指图”。
1 2 3 4 5 6 7 8 9
| .image-demo-2 img { border: 1px solid #666; border-radius: 5px; padding: 5px; margin-right: 8px; } .image-demo-2 a:last-of-type img:hover { box-shadow: 0 0 2px 1px rgba(0, 140, 186, 0.5); }
|
响应式图片
响应式图片会自动调整自身大小以适应屏幕尺寸
1 2 3 4
| img { max-width: 100%; height: auto; }
|
图片卡片
1 2 3 4 5 6
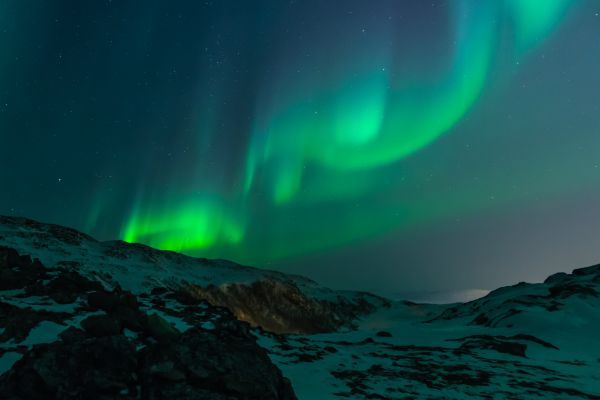
| <div class="polaroid"> <img src="rock600x400.jpg" alt="极光"> <div> <p>漂亮的极光</p> </div> </div>
|
1 2 3 4 5 6 7 8 9 10 11 12 13 14
| .polaroid img { margin: 0; width:100%; } .polaroid { width: 60%; box-shadow: 0 4px 8px 0 rgba(0, 0, 0, 0.2), 0 6px 20px 0 rgba(0, 0, 0, 0.19); background-color: white; margin-bottom: 20px; } .polaroid div { text-align: center; padding: 10px 20px; }
|
半透明图片
opacity 属性用在图片上会产生半透明的效果,其值在[0,1]区间,值越低透明度越高。
动态覆盖
鼠标移到图像上时创建一个其它元素动态覆盖到上面的效果。
1 2 3 4 5 6 7 8 9
| <div> <div class="container"> <img src="avatar.png"> <div> <div>Hello World</div> </div> </div> ... </div>
|
1 2 3 4 5 6 7 8 9 10 11 12 13 14 15 16 17 18 19 20 21 22 23 24 25 26 27 28 29 30 31 32 33 34 35 36 37 38 39
| .container { position: relative; float: left; width: 20%; margin-right: 8px; } .container img { display: block; height: auto; width: 100%; margin: 0; } .container > div { position: absolute; width: 100%; top: 0; width: 100%; height: 100%; overflow: hidden; background-color: #008cba; transition: .5s ease; } .container > div > div { white-space: nowrap; color: white; font-size: 20px; position: absolute; top: 50%; left: 50%; transform: translate(-50%, -50%); overflow: hidden; } .container:nth-of-type(1) > div {height: 0; } .container:nth-of-type(2) > div {width: 0; } .container:nth-of-type(3) > div {opacity: 0; } .container:nth-of-type(1):hover > div {height: 100%; } .container:nth-of-type(2):hover > div {width: 100%; } .container:nth-of-type(3):hover > div {opacity: .8; }
|
图片滤镜
这是本文的重点部分,主要涉及CSS3新增的 filter 属性,该属性作用是为页面中的元素(主要是图片)添加某些可见的效果,例如模糊、高光等。
filter 属性的浏览器兼容情况如下:
| Property |
Chrome |
IE |
Firefox |
Safari |
Opera |
| filter |
53.0
18.0 -webkit- |
13.0 |
35.0 |
9.1
6.0 -webkit- |
40.0
15.0 -webkit- |
filter 属性的语法如下:
1
| filter: none | <filter-function> [ <filter-function> ]*
|
可以同时应用多个滤镜,滤镜函数之间用空格分隔
blur
此滤镜用来改变图片的清晰度,blur(px) 函数接受一个具体的像素值(当然要大于0了)为参数,默认值为0,即默认不模糊;参数越大,模糊效果越强。
1 2 3 4
| .blur-demo a:last-of-type img { margin-left: 4px; filter: blur(3px); }
|
brightness
brightness滤镜用来改变图片的亮度,brightness(%) 函数接受百分比作为参数,默认值为100%,即原图的亮度;值越小图片变地越暗,0%会将图片完全变黑;反过来,如果参数超过100%,图片会变地更亮。
1 2 3 4
| .brightness-demo a:last-of-type img { margin-left: 4px; filter: brightness(60%); }
|
contrast
contrast滤镜用来调整图片的对比度,contrast(%) 函数接受百分比作为参数,默认值为100%,即原图的对比度;0%会使图片变成全黑,而超过100%的参数会使图片对比度更强。
1 2 3 4
| .contrast-demo a:last-of-type img { margin-left: 4px; filter: contrast(60%); }
|
grayscale
grayscale滤镜用来转变图片灰度,grayscale(%) 函数接受百分比值为参数,默认值为0%表示不改变原图灰度;100%表示使图片完全变成灰色(只有黑色和白色,即黑白图片)。
grayscale(%) 函数参数不允许为负值。
1 2 3 4
| .grayscale-demo a:last-of-type img { margin-left: 4px; filter: grayscale(1); }
|
hue-rotate
hue-rotate滤镜可以理解为“色相旋转”,用来改变图片的色相;hue-rotate(deg) 函数接受一个角度值为参数,表示图片色调在色环上旋转的角度;参数默认值是0度,表示保持原图不变;该函数的参数最大值是360度。
1 2 3 4
| .hue-rotate-demo a:last-of-type img { margin-left: 4px; filter: hue-rotate(90deg); }
|
invert
invert滤镜作用是反转图片颜色(反色),invert(%) 函数接受百分比为参数,默认值是0%表示保持原图不变,100%表示图片颜色完全反转。
invert(%) 函数参数不允许为负值
1 2 3 4
| .invert a:last-of-type img { margin-left: 4px; filter: invert(1); }
|
opacity
opacity滤镜容易理解,就是改变图片的透明度;opacity(%) 函数也接受百分比为参数,100%表示完全透明,0%是默认值,表示保持原图不变(完全不透明)。
opacity(%) 函数参数不允许为负值
该滤镜与 opacity 属性的作类似
1 2 3 4
| .opacity-demo a:last-of-type img { margin-left: 4px; filter: opacity(.3); }
|
saturate
saturate滤镜用来改变图片的饱和度,saturate(%) 函数接受百分比为参数,0%(0)会使图片完全不饱和,默认值为100%(1),表示保持原图饱和度不变,超过100%的参数会使图片更加饱和。
saturate(%) 函数参数不允许为负值
1 2 3 4
| .saturate-demo a:last-of-type img { margin-left: 4px; filter: saturate(1.5); }
|
sepia
sepia滤镜用来实现图片的“老照片”效果,sepia(%) 函数也接受百分比为参数,默认值为0%表示保持原图不变,100%会使图片完全“老照片化”。
sepia(%) 函数不接受负值为参数
1 2 3 4
| .sepia-demo a:last-of-type img { margin-left: 4px; filter: sepia(1); }
|
drop-shadow
drop-shadow滤镜用来给图片设置一个下沉阴影的效果,类似于 box-shadow 属性;drop-shadow() 函数语法相对其它滤镜来说更复杂一些,下面仔细描述一下。
函数语法:
1
| drop-shadow(h-shadow v-shadow blur spread color)
|
| 属性值 |
描述 |
| h-shadow |
必须,指定水平方向上的阴影距离,具体像素值,负值会使阴影在图像左边 |
| v-shadow |
必须,指定垂直方向上的阴影距离,具体像素值,负值会使阴影在图像上边 |
| blur |
可选,必须为具体像素值,用于给阴影添加模糊效果,不允许为负值。值越大阴影越模糊,默认值为0 |
| spread |
可选,必须为具体像素值,正值使阴影扩展,负值使阴影收缩,默认为0
Chrome, Safari 和 Opera等浏览器不支持该参数,添加了可能导致阴影不渲染* |
| color |
可选,指定阴影的颜色,不指定则根据浏览器来定(一般是黑色) |
1 2 3 4
| .drop-shadow-demo a:last-of-type img { margin-left: 4px; filter: drop-shadow(6px 4px 2px rgba(200, 90, 90, .9)); }
|
多滤镜
可以同时应用多个滤镜,多滤镜函数之间用空格分隔。
1 2 3 4 5 6 7
| .multi-filter-demo a:first-of-type img { margin-right: 4px; filter: blur(1px) hue-rotate(80deg); } .multi-filter-demo a:last-of-type img { filter: drop-shadow(6px 4px 2px rgba(200, 90, 90, .9)) sepia(.8); }
|


